Last updated at Wed, 30 Aug 2017 01:54:08 GMT
In network security, the questions are urgent. Are we protected against malware? Do we have protocols in place to prevent a hacker from breaking in?
Sometimes, however, you need to look back in time and see what the status was in the past.
If you have been tracking a vulnerability and it finally goes away, you might want to check the information in a past scan and compare it to changes in your environment.
Another reason you might want to report on a historical scan is an audit. If you are required to scan your environment quarterly, you may need a report to prove to the auditor that you scanned in the past. Suppose the scanning was previously done by someone who has left the company, and you have no idea where he or she stored the report. If you can generate a report on a past scan, you can still give the auditor the necessary information.
As of Nexpose 5.9.17, you can select a historical scan to report on from the Security Console web interface.
To do so:
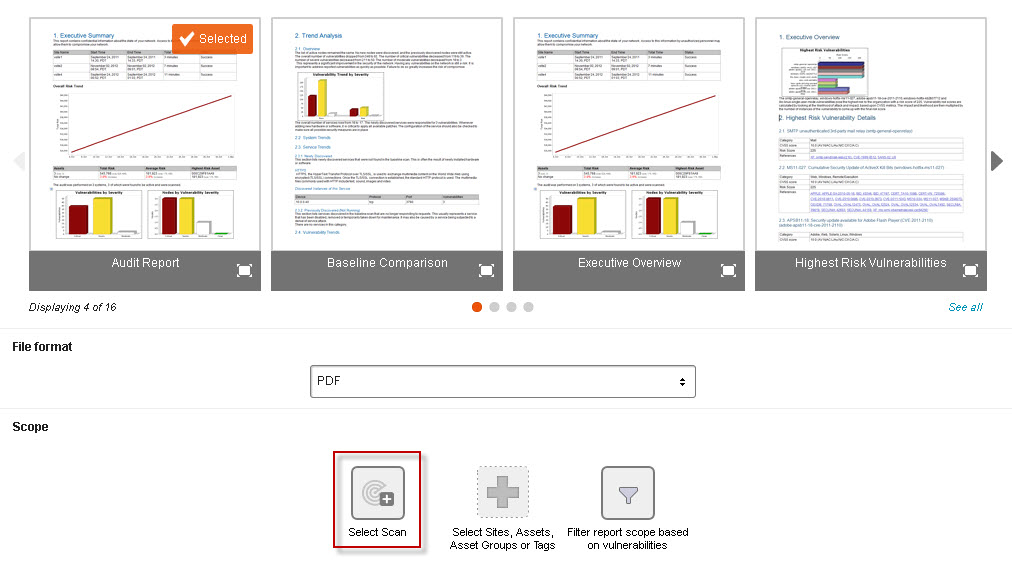
- Go to the Reports tab and create a new report. When you specify the scope of the report, you will see a new option to select a specific scan.
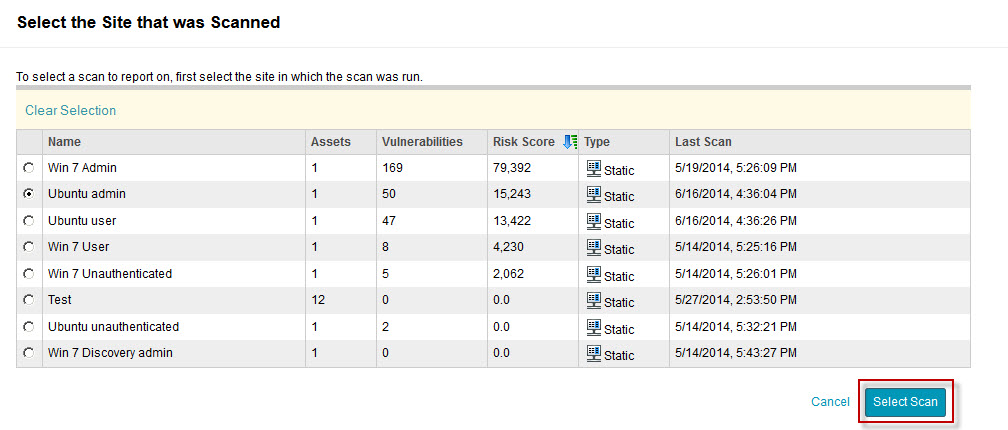
- To select a scan, you'll first need to select the site that was scanned. In the window titled Select the Site that was Scanned, select a site. Then click Select Scan.
NOTE: If you select a scan to report on for a given report, you cannot select sites, assets, or asset groups for the scope of that report.
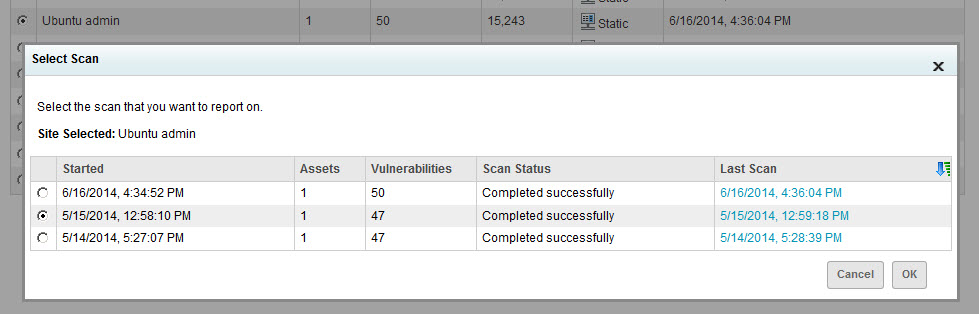
- In the window titled Select Scan, select the scan that you want to report on. Then click OK.
NOTE: Historical scan reporting is not supported in certain report types that require multiple scan results: Baseline Comparison, Executive Overview, Vulnerability Trends, Asset Report Format (ARF), or XCCDF Human Readable CSV Export templates. If you select the scan reporting feature, you will not see these templates.
This functionality is still available in the API as well as the Web interface, so you can create customizations and integrations that address your specific situation.
With this new feature, it is easier to see where you have been as well as where you are, so you can quickly get the reports you need.
